How to create a project?
The goal of the project is to create comprehensive content for a lesson, educational course, After school club, etc. It is not primarily proof for Prusa Research that you use a 3D printer, but a material that other educators will use.
We consider these criteria important:
Originality
Unique ideas are valuable and very welcome. However, even seemingly ordinary and previously developed topics are welcome. However, they have to be all the more interesting, in short, they should be useful in some way.
Complexity
The project does not have to be complicated. What is important is clarity and adequate treatment for the age of the pupils/students. Always check feasibility in practice. You will make it easier for others to further use your creation and you can also share information about pitfalls you have encountered in developing the project.
Quality
It’s not just about the quality of the 3D printing itself. The 3D model itself does not have to be the project’s focus. What is also important is the clarity, the quality of the lesson plans, and the theoretical background – the description of the related material (historical context, formulas, mathematical lessons, etc.). We will be happy to promote the best quality projects as featured projects actively.

The project documentation
The documentation must include information on who the project is for, what is needed, how to prepare and how to implement the project from start to finish. We like to refer to the style as a cookbook (i.e. it lists the ingredients and the complete process), not a report (which just describes that we went somewhere and did something).
Required project documentation
Mandatory project documentation are files or folders of files that must be created and uploaded upon submission. they must include information about who the project is for, what is needed, how to prepare, and instructions on how to carry out the project from start to finish. We like to liken the style to a cookbook (i.e., it lists ingredients and the complete process), not a report (which just describes having been somewhere and done something).
-
Curriculum
It serves as the basic description of the project and as a lesson plan. The required points are written in a template curriculum. Copy the pre-prepared curriculum into your own document and use it as a form, keeping the headings and order of the points. No other form will be accepted to maintain a uniform format. If you want to add some extra information to the outline, create item number 11 at the end with the heading Notes, where you can add any text you want.
-
3D models
All 3D models from the project must be attached in STL format (see other options in Optional project documentation). Thanks to the pre-prepared files you can print the models before the actual implementation as a demonstration at the beginning of the lesson.
-
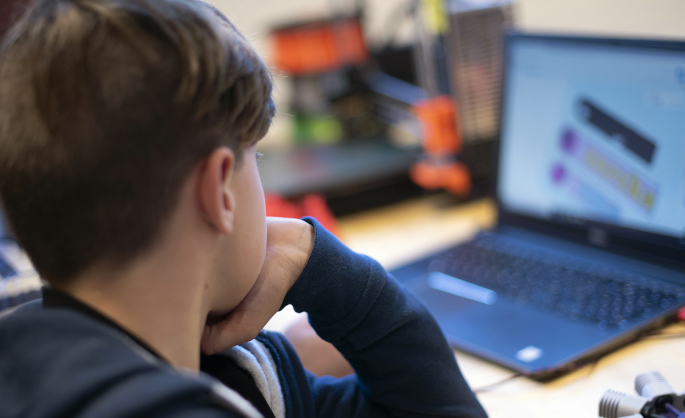
Images and pictures
The photographs should act as a teaser for others to attract attention and create interest in starting the project. When taking photos, stick to these basic rules:
- Shoot landscape.
- The size of the file should always match the quality and be between 300 kB and 3 MB.
- Take photos in good lighting conditions. Make use of daylight and avoid harsh shadows (harsh light from one direction).
- If possible, use a tripod or at least rest your phone on a pad to avoid blurry photos.
- Take photos of the printed models or printer from several different angles.
- Aim for a simple background with no distracting elements. Focus on authentic photos of the classroom or work environment.
- Don’t try to digitally edit the photo. If necessary, we will tweak the colors, size, or other parameters ourselves.
What the photographs are meant to capture:
- The process of creating the project.
- Photo of the finished project.
- Photo to attract attention.
- Work with children.
- Location of the printer.
-
Instructions for 3D modelling
- It is used to create individual components and STL models attached to the project.
- If the project is intended for complete beginners, it is necessary to explain the modeling process in detail, ideally in the form of step-by-step instructions.
- For more advanced projects, the instructions can be described in an abbreviated format. For example, if the target group is expected to have a basic knowledge of a particular modeling program, it is no longer necessary to write instructions with a detailed description of each step, but only a brief list of the functions used. It is only necessary to go into detail where the procedure will be complicated or non-standard. Instructions are always about accuracy and clarity.
- If the project involves modifying or extending an existing model, be sure to include the model in its original editable format. Example: Autodesk Fusion 360 – .f3d file, Autodesk Tinkercad – link to shared project, etc. This will make it much easier for others when editing.
- Create the manual itself as a PDF document. It is also possible to attach a technical drawing with drawings (output from Autodesk Fusion 360, Solidworks,…).
TIP
We recommend that you test the instructions on a colleague, for example. You can find a sample step-by-step tutorial here.
-
List of other used parts and accessories
Make a list of everything that is needed for the project, beyond the obvious things (computer, 3D printer, pencil, paper…) Examples could be glue, screws, paint, a ball of string, etc. If there is a specific brand or manufacturer of materials and accessories that has proven useful in your work, write down the exact name of the brand and ideally a link to the shop.
Optional project documentation
-
Presentation
The lesson can include a presentation with additional photos or explanations and details to make the lesson more attractive.
-
Other educational materials
Almost anything can be included in these materials. In most cases, these are worksheets, map materials or pictures. The materials do not have to be directly related to the project, but also to the material being discussed.
-
Video
It can serve as a substitute for the modeling instructions. The video must be publicly available.
Video parameters:- Minimum resolution 720p.
- Published ideally via Youtube platform on the school’s or enrolled organization’s channel.
-
3D models in other formats
For even easier project preparation, it is possible to submit 3D models in other formats besides STL files. Examples are the 3MF or G-code format Each format has its advantages and disadvantages. The most important features of the mentioned formats are listed below for comparison.
Original format from a 3D modelling program (.f3d, .step, .dwg, .dxf,)
-
Pros
- Full editing capability in the program with workflow.
-
Cons
- For 3D printing, you need to first export as 3MF/STL and then prepare for printing in G-code format.
- In most cases, it can only be opened in the original software program.
STL
-
Pros
- Can be easily viewed and simple adjustments can be made.
- Can be opened in almost anything, the most widely used format for 3D models.
-
Cons
- More complex edits are no longer possible (the model is already irreversibly converted into a grid of triangles).
- The model is not ready for printing. It is necessary to adjust the individual parameters (layer height, material, etc.) To generate the G-code, the settings must be re-entered each time.
3MF
-
Pros
- All the advantages of STL.
- Full compatibility with STL.
- Full compatibility with STL.
- Saves print settings in addition to the model itself. If nothing is changed during slicing, G-code generation is a click away.
- More economical format compared to STL (Files are smaller). Models are saved in the same compression as a ZIP archive.
G-code
-
Pros
- Completely ready to print file, just put it in the printer.
-
Cons
- Specifically set 3D printer and material type without any simple editing.
-
More FAQs
What to look out for when creating a project?
- Do not use images, graphics, or text that you do not have the licensing rights to.
- Quotes, text, and images: it is important to include the source from which you are referencing.
- If you use or extend someone else’s project, you must acknowledge the source.
- Do not embellish the documents or presentations themselves in any way. Use simple formatting and plain fonts (Arial) You may use the school logo and name (insert into the document).
- Keep in mind that the project will be used by other teachers. Try to make it look like what you would imagine teaching material designed for you would look like.
- Always ensure you have permission to photograph all participants.
- Print and test the models yourself before submitting. Printing may reveal flaws in the models.
TIP
Avoid making a model of a school logo, a key ring, a sports medal, a pencil case, a bookmark, a model of a school or a simple stand for a mobile phone and pencils or markers on the blackboard. At the same time, check if the theme of your project has already been worked on several times in the Printables.com database, so that the projects are not unnecessarily repeated. Everybody starts with similar models in 3D printing and will want to create a completely custom version. The project should address a specific lesson.
Where to create a 3D model?
We do not restrict the choice of program in any way. If the program is paid, it is important to mention this in the recommended project curriculum/lesson plan. If you are using only commonly known functions (extrude, revolve, fillet, etc.), just describe them so that the instructions are understandable even for a slightly advanced user of another 3D program. If a paid program can be obtained for free under an EDU license, please post instructions for obtaining it.
List of programs we encounter most often:
- Autodesk Tinkercad
- Autodesk Fusion 360
- Autodesk Inventor
- SketchUp
- Solidworks
- OpenSCAD
- Blender
- Rhinoceros
- Catia
How to submit the project?
- Once you start working on a project, you can save the content continuously in your Printables profile under the Create button in the top bar. Select Project in the drop-down box and you can start uploading. If you don’t have a Project button in your menu, please contact us by email. Do not upload a project under the Model tab, this is for individual 3D models.
- You can simply upload all files related to the project via the orange box above the form, they will be sorted into the appropriate categories (photos, print files, outline and instructions…) automatically. Please note, you cannot upload formats from Word, Excel and Powerpoint (docx, xlsx, ppt), you need to save them as pdf (you can do it directly in these programs).
- Each individual text field of the form has help, the content corresponds to the recommended outline (so you can usually just copy from it). Note that the Brief Description field has a limit of 200 characters, so you need to shorten the text appropriately.
- By dragging with the mouse you can change the order of the photos and determine which will be the initial one and how they will follow each other. Upload a reasonable number of photos, e.g. 2-3 photos of finished prints will suffice. Beware of GDPR (children’s faces).
- Once the files have been uploaded, at the very bottom of the form select the Creative Commons (4.0 International License) Attribution—Noncommercial—Share Alike
- Once you are happy with your project switch it from concept to published and submit it for approval.
- We will approve the project as soon as possible or get back to you with feedback on the project and any necessary adjustments.
Project publication
After approval, we will publish the project in the Printables.com database, where you can find all approved and submitted projects, which you can freely download and use in your own teaching. If you get an error message with an unauthorized download, please contact [email protected]
What’s next?
- You can try some of the projects published by other schools. The authors will be happy to hear from you and share feedback. If you hear from another school interested in applying for the program, direct them to education.prusa3d.com
- Do you have another project idea to share? We’d love to hear about other projects and will be happy to reward activities.
- If you have a problem with your 3D printer, feel free to visit our knowledge base where you can find all the tutorials on printer builds, calibrations, etc.
- Looking for models to print? Check out the Printables.com database where you will find a wide range of models.